What is an ellipse? It's how artists represent a circle in perspective, and it is…
3 Awesome Reasons why Clipping Masks will up your Vector Game
Adobe Illustrator is an amazing tool that can make some very versatile artwork. However, most people don’t try to make their Illustrator work very realistic.
One of the great tools in Illustrator that has expanded my illustration capabilities is called “clipping masks”.
So, what is a clipping mask?
A clipping mask is a shape layer that you have decided to use as a perimeter for additional sub-layers. Essentially, the sub-layers can extend beyond the boundary of the master clipping layer, but you will only see what is inside the master layer.
OK, but why do I care and how will this help me?
1. It allows you to paint more realistically
I am 100% a fan of stylized artwork… if it fits the situation. However, I also like to find the limits of my tools and be prepared to use them in other ways as well. So, that begs the question of… how?
2. Clipping masks let you work more quickly and cleanly.
If you want a shape within a shape, you don’t have to try to make the edges match up perfectly. This saves time and prevents the risk of a sliver of blank canvas showing through
3. It gives you the ability to soften edges within other forms.
Does everything have only hard edges? No! Although vector art is most frequently done in this way (and the cel style can look very cool), I want you to have more options.
Where the light turns on a baseball, you see a soft transition from light to shadow–but a fairly firm line from the baseball itself to the background behind it. If we wanted to use clipping mask on a baseball, we could use a sphere for the master clipping mask layer, then layer place blurred shape layers underneath for the shadow, reflected light, and highlight. This way the blurs can run off the edge for a natural look.
Let’s go through an example:
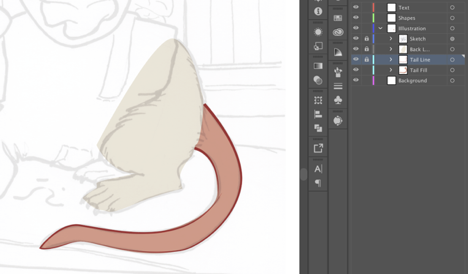
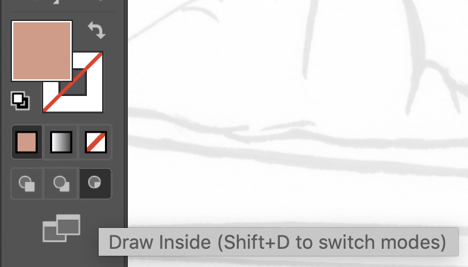
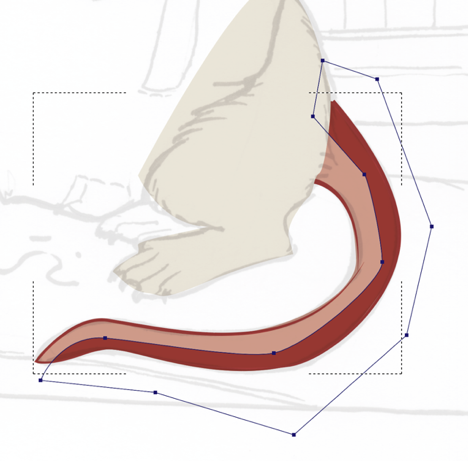
Say I want to realistically render a mouse tail (add shadow, reflected light, highlight, etc) but want to be sure those modifications stay within the shape of the tail. If I select the object (it must have a fill on it), then choose Draw Inside from the bottom of the tools palette, it will activate a “Clipping Mask” for that object. This means that I can create more shapes but they will only be visible within the original shape (they will be “clipped” to that shaped, AKA, the shape itself is serving as a mask).
A frame will show up around the object which will confirm that Draw Inside is activated and you have the correct shape selected
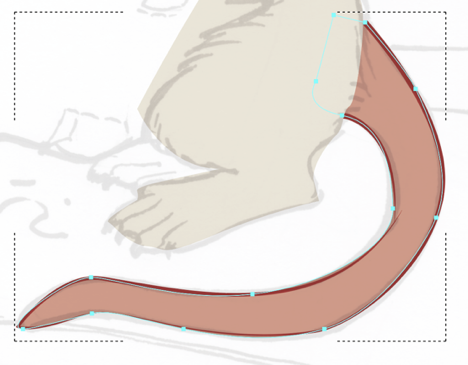
As you can see with this example shadow, I’ve created my shadow shape far larger than my tail, but it only shows up within the tail.
Now I can add a blur to it, change the blend mode if I want (In the transparency panel, e.g., to Multiply, Screen, Hue, Saturation, Color, etc…), etc. I can continue to add shapes as long as the frame is activated.
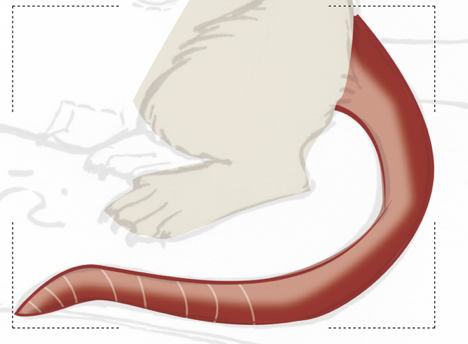
When done, just double-click outside of the frame or click on “Draw Normal” (next to “Draw Inside” on the tool palette). You can go back in and find those shapes in a newly created group in your layers panel. You can still edit any of them (including the original shape–here that would be the tail).
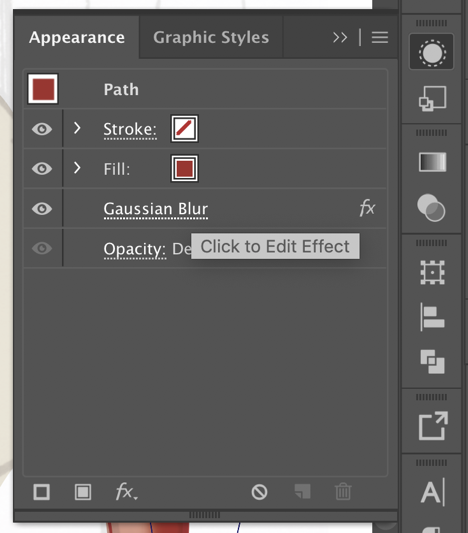
Remember, you can also always go back and adjust your Effects in the Appearance Panel (e.g. blur).
Did you find this helpful? Do you have any of your own tips you’d like to share? I’d love to hear about it if you decide to try something new. If you use it differently, I’d love to hear that, too!

-Laura
Related Posts